Laser Heavy
Phoenix II —FAQ (IOS)

BOOKMARK
FAQ (IOS) by light_rock_zz
Version: 5.3 | Updated: 07/29/2025
FAQ of the Month Winner: January 2020 | Highest Rated Guide
Mission Types
Laser Heavy
| Details & Strategies for Laser Heavy Mission Types | |||
|---|---|---|---|
| Laser/Shuriken/Pellet | Laser/Shuriken | Laser/Pellet | Lasers Only |
Click on the mission intel icons or the text links in the box for different Invader weaponries to check out strategies on how to deal against them.
Laser/Shuriken | Laser/Shuriken/Pellet |
|---|---|
Laser Density: High General Difficulty: Medium to Very Hard Brief Description: A laser heavy mission that can feature quite a lot of bullets, with occasional floods of shurikens. Requires a balance between a good laser and bullet defence. | |
Mission Intel: Other Bullets: Shurikens Invader Weaponry Notes:
Other Notes:
| Mission Intel: Other Bullets: Pellets, Shurikens Invader Weaponry Notes:
Other Notes:
|
The difference between Laser/Shuriken and Laser/Shuriken/Pellet is the additional presence of pellets in the latter. This is not very significant, although a few pointers will be made about the additional presence of pellets.
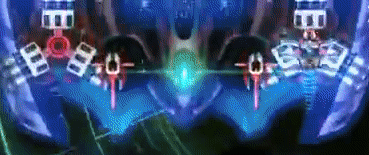
Example of a Laser/Shuriken mission type (Marshal S2):
Example of a Laser/Shuriken/Pellet mission type (Marshal S2):
Survival
- Auras & Zens
- (+) Bullet EMP
 works very well here against pellets and shurikens. The reset of lasers
  is also useful, although the bullet clearing of pellets, shurikens (or even Super MIRVs or pellets from Caged MIRVs
  ) is really the main selling point here.
 - (+) Similarly, Reflex EMP
 is also a useful tool to clear out shurikens and pellets. Unfortunately, Reflex EMP against Super MIRVs may not work the best, but it is still decent.
 - (+) Vorpal Lance
 or Goliath Missile
  to eliminate annoying Ravens
  with cone lasers .
 - (+) Teleport
 works well to counter against shuriken launchers (spread), since they won't fire until they achieve a brief lock on to you. T3 and T4 shuriken launchers (spread) can be baited to fire, then Teleport away to avoid their shurikens.
- You can also use Teleport to get above a criss-cross pattern of interlocking pellet spreads, if the RNG happens to be really bad.
- You can also use Teleport
- (+) Barrier Reflector, once again, works very well here due to the high density of lasers . Shurikens are generally not a huge concern when Invaders will likely die before shurikens even get to you.
- Even if pellets and/or shurikens do get to you, you can simply deploy a barrier
 to slice a thick cloud of shurikens so you have some breathing space. It is rare that you would ever need to do that from how potent the Barrier Reflector apex is.
 - Unfortunately, the same cannot be said about Phalanx Reflector, since it now has to deal with shurikens and pellets after laser reflecting, wasting many charges of Phalanxes
 just to clear bullets rather than reflecting lasers .
- Even if pellets and/or shurikens do get to you, you can simply deploy a barrier
- (=) Barrier is a decent Aura against both bullets and lasers , since one barrier will usually last against a full burst of lasers. Barrier's ability to cut up shuriken clouds also make it quite useful.
- (=) Personal Shield
 still works ok here due to the laser heavy nature of this mission. Personal Shield works fine against pellet spreads since Fade Out covers a small distance.
- Personal Shield works quite poorly against shurikens, but the Fade Out of Personal Shield is still able to allow you to cut through some tight walls where required.
- (=) Phalanx works ok and clears out shurikens well, but are weak against lasers , so prepare to strafe when under laser fire. You will have to shovel diagonally and deploy several Phalanxes to survive both the bullet hell and the current burst of lasers.
- (-) Point Defence
 is a difficult Aura
  to use due to the huge amount of shurikens that appear. It also cannot deal against lasers . However, it does work to clear some pellets from Caged MIRVs . For Super MIRVs, trigger them first but be careful not to trigger the pellet MIRVs
  as well, then try to use Point Defence to eliminate the pellet MIRVs.
- (+) Bullet EMP
- When dealing with T3 and T4 shuriken launchers (spread), try to allow all of them to lock on and start firing at you at the same time, so that you can strafe to the other side.
- Pellet Spreads can get annoying when they start appearing in huge numbers, particularly if more than 2 of them in a row. Quite a lot of it starts to count on RNG from Raven and Heron
 movements. Generally, it's easier to just dodge from the side of the field if too many pellet spreads are in the middle.
 - Draw all the shuriken launchers to one side, and then before lasers fire, strafe to the other side.
- Eliminate T3 and T4 shuriken launchers first. If this is not possible, aim for Ravens with cone lasers that make dodging nearly impossible.
- Due to the blockade caused by shurikens, it can be very difficult to mass trigger laser MIRVs
 . The massive de-sync between lasers from laser MIRVs as well as the firing of lasers from laser turrets themselves make it very difficult to accurately predict which line is actually going to fire next even when you have the sounds turned on. Most of the time, it is best to assume that all the laser turrets are going off at once and stay off the laser lines at all times, particularly when you hear the sound of lasers firing.
 - Alternatively, go upfield above the shuriken launchers and the pellet launchers/spread. In this regard, auto aiming ships actually work quite well for this mission since shurikens and pellets can be more easily avoided.
- However, if Caged MIRVs exist, you can only go upfield once these pellets from Caged MIRVs are cleared off the field. Thus, you would have to make a dash above the shuriken launchers before they start firing.
- Another very important thing to take note of is to make sure when you dash above these shuriken launchers, make sure that all the shuriken launchers are rotating in the same direction, so push along the very edge of the field. Otherwise, even one shuriken launcher rotating in the wrong direction will cause the upfield to be flooded with no way out.
- However, if Caged MIRVs
- Condors
 or Rocs
  with all of laser MIRV Bloomers, fast tracking lasers and T3 or T4 shuriken launchers (spread) are the WORST. The only way past these menaces is to draw the shuriken launchers to one side, then strafe to the other side as the fast tracking lasers are about to fire. To repeat this for many rounds is a huge problem.
- If you wish to survive this menace with a difficult ship like Ogon, go above the shuriken launchers and bait them to fire before they can turn upwards. Then, be very careful of laser MIRVs that are emitted, it WILL be a tight squeeze. After the shuriken launchers take a break, you can quickly head downfield again to avoid the tracking lasers , and yet not get shot point blank by laser MIRV Bloomers. Note that this technique has very low success, so it's easier to use a better ship that can survive this menace.
- If you wish to survive this menace with a difficult ship like Ogon, go above the shuriken launchers and bait them to fire before they can turn upwards. Then, be very careful of laser MIRVs
- When Caged MIRVs appear, it can get very messy unless you have an Aura / Zen
 that has both bullet clearing and damage capabilities.
 - In particular, a very deadly combination is cone lasers coupled with Doomsday Bombs
 .
.- Cone lasers disallow you to move sideways, while Doomsday Bombs prevent upward movement, trapping you between cone lasers with not much space above you.
- As mentioned, it is difficult to know if the cone laser is actually going to go off even as you hear the sound as it could be from another laser turret instead.
- Although Doomsday Bomb has an obvious sound of its own, it actually takes some time after the sound goes off before it actually fires. That duration can make you anxious and keep staying at the bottom of the field. The duration is enough to do stuff like going upfield to launch Bullet EMPs (even if they might be small), or complete a single Phalanx shoveling.
- Cone lasers
- This is a mission that is possible to get Ogon Is Fine
 badges. If Caged MIRVs appear, the difficulty of getting this badge significantly increases. If Doomsday Super MIRVs
  appear, just simply hide at the extreme top left or top right corner of the screen, and you should be safe. Also, beware of Doomsday Bombs .
Speedrunning
- Auras & Zens
- (+) Barrier Reflector apexes are king here. Properly sized and placed barriers can catch a huge amount of lasers coming from laser MIRVs , which is the biggest key. It is almost automatic that you will catch all of the tracking lasers and spread lasers (the latter being a little RNG based) if your barriers downfield spans the whole width of the field.
- (+) Personal Shield is without a doubt, an offensive tool in this mission type. Having Super Reflect apexes are often not really necessary in higher ranks due to the sheer crazy amount of lasers that can be on field, other than when Rocs with not many laser MIRV Bloomers are present.
- Generally, Personal Shield should only be used in heavier waves in Act 3, or Act 4 and above since Invader lasers take 4s to fully fire. By then, most of, or all of the Invaders would be dead by your main weapon
 + any offensive Aura before you can reflect the lasers.
- Generally, Personal Shield
- (+) Since shuriken wave launchers generally take some time to achieve a brief lock on and then fire, charging Mega Bomb
 is slightly more lenient in this mission type. However, beware of T3 or T4 shuriken launchers since those fire immediately once the Invader(s) is/are on field.
 - (=) Mega Laser
 works to clear out shurikens to head upfield and go point blank with Invaders
 - (=) Phalanx Reflector allows some speed but it only catches tracking lasers and cone lasers effectively. Difficult to catch lasers coming from laser MIRVs .
- (+) Barrier Reflector apexes are king here. Properly sized and placed barriers
- Without a doubt, reflecting as many lasers as possible is key to going fast.
- Traditional offensive Auras and Zens can still do very well here.
- When faced with less lasers or not many laser MIRVs , thus finding it difficult to find a good spot to reflect more than 4 lasers, a good technique is to trigger a laser MIRV, then go right on top of the center of the triggered laser MIRV and reflect all the lasers, which is at least 5 or 9 lasers (T1 and T2 laser MIRV respectively)
- While this relies on luck, sometimes it's possible to go down the middle and make your way through several pellet spreads. Such a move allows a lot of grazing which benefits offensive Auras .
- Same strategy for turret elimination, eliminate T3 and T4 shuriken launchers and spreads first.
- Since laser MIRV Bloomers are your main source of laser reflecting, usually the best idea is to be inbetween the laser MIRV Bloomers and around the middle of the field in order to pull off the most optimum Personal Shield laser reflects.
Fun
- Auras & Zens
- (+) Personal Shield for extremely satisfying laser reflects and vaporizing waves, especially those with a lot of laser MIRV Bloomers.
- (+) Top it up with Super Reflect for even more fun.
- (+) Barrier Reflector apexes are a huge ton of fun to use.
- (+) Personal Shield
- (+) Activating a ton of laser MIRVs at the same time fills the field with a crazy amount of lasers . While slightly ironic to say, it is a beautiful mess.
- (-) Otherwise, having to deal with many lasers and bullets at the same time isn't fun.
Lasers Only | Laser/Pellet |
|---|---|
Mission Intel: Laser Density: Extremely High Invader Weaponry Notes:
| |
Other Bullets: None General Difficulty: Very Easy Brief Description: The very high density of lasers combined with laser MIRVs makes it for great Personal Shield usage. The absolute lack of any bullets make this mission very easy. Invader Weaponry Notes:
Other Notes:
| Other Bullets: Pellets General Difficulty: Easy Brief Description: Similar to Lasers Only missions, except with annoying pellets. Invader Weaponry Notes:
Other Notes:
|
Example of a Lasers Only mission type (Marshal S2):
Example of a Laser/Pellet mission type (Marshal S2):
Survival
- Auras & Zens
- (-) Teleport isn't an ideal Zen because it's easy to keep on abusing Teleport and then run into long charge times, potentially, triggering laser MIRVs one by one, eventually leading to sticky situations.
- (+) Personal Shield is an easy Zen to use, and a good counter offence as well. Use Personal Shield to reflect as many lasers as possible, including those laser lines from mass triggering laser MIRVs .
- If the wave instantly vaporizes after one round of laser reflect, take care not to use it in the next wave since Personal Shield needs time to cool down (unless you have the Personal Shield Focus apex). Take your time to clear out the last Invaders if you are not using an instant tracking or perfecting homing main weapon . Otherwise, using either of the 2 mentioned main weapon types will usually give you time to recover Personal Shield since their DPS is lower.
- If the wave instantly vaporizes after one round of laser
- (+) Barrier Reflector is the best Aura out there, as putting it downfield protects yourself and deals huge counter offensive damage. Just make sure you always have enough for a minimum size of barrier to be deployed.
- (+) Vorpal Lances and Goliath Missiles eliminate annoying Ravens that are carrying cone lasers .
- (+) Charging Mega Bomb at the right place is usually not a problem, unless pellet spinners (spiral) are around since they charge up quickly. But the number of occurrences are usually very low.
- (=) Phalanx Reflector will be slightly difficult as it requires skill to not burn through Phalanx charges too fast. At best, 2 Phalanxes are needed to reflect a huge amount of lasers , although 3 is the ideal balance between surviving the lasers.
- If you don't have enough Phalanx charges, slowly move to one side when reflecting lasers , and then, at your last Phalanx charge, move quickly like you are avoiding the tracking lasers (if there are any tracking lasers locked onto you).
- If you don't have enough Phalanx
- Lasers Only - (=) Chrono Field
 ships may not work too well here since there are no bullets to graze off. You will have to rely on grazing off laser lanes from laser MIRVs to do Chrono Hopping.
 - Lasers Only - (-) Bullet EMP , as already implied in its name, is not very useful in this mission, unless you are using the Destructive Wave apex. However, the reset stun
 of Bullet EMP can save you once or twice in a difficult wave.
 - Lasers Only - (-) Reflex EMP is nothing more than 20 AoE damage, since it would be too late to clear laser MIRVs . This is unfortunately, mediocre damage compared to Mega Bomb .
- Lasers Only - (-) Similarly, Phalanx is useless since it breaks easily under laser fire. Unless you are using a Phalanx Reflector apex, but even such apexes are a bit harder to use.
- Lasers Only - (-) Point Defence is not very useful as well since it only eliminates laser MIRVs , but doesn't solve the problem of tracking lasers and cone lasers.
- Laser/Pellet - (+) Bullet EMP , Phalanx & Reflex EMP could be useful against pellet spinners, especially those on Condors or Rocs since the pellet spinners might around for some time.
- Laser/Pellet - (=) Point Defence can help somewhat to deal against pellet spinners.
- (-) Teleport
- Among the easiest mission types out there. With a total lack of bullets, there is complete freedom to be anywhere on the field you want.
- Eliminating laser MIRV Bloomers is your utmost priority in surviving.
- If required, eliminate laser MIRV Launchers if your ship is not an auto aiming ship. Although most of the time, laser MIRV Launchers don't throw too many laser MIRVs on field, so they are not too deadly.
- Using auto aiming ships is another good idea, and makes such missions easier to play.
- Just be careful when you go upfield as laser MIRV Bloomers upfield will almost certainly cause you to die either by the laser MIRVs themselves or the lack of space between intersacting lines. Otherwise, you can simply camp upfield.
- Just be careful when you go upfield as laser MIRV
- If there are a lot of tracking lasers , especially very fast tracking lasers in heavier waves, be sure to have them all rotate clockwise or counter clockwise. Having tracking lasers rotate in both directions can make them dice you if the firing intervals are correct. To ensure this, try to start from downfield first, then have all the tracking lasers start rotating one way, then move upfield on the corresponding extreme side of the field to "guide" the tracking lasers.
- It's not the end if 1 or 2 tracking lasers rotate in the opposite direction, but be careful when that happens. If it happens, try to move closer to one group of lasers so you can have these group of lasers be fully tracked onto you for a short while so there is a less chance of getting diced.
- It's not the end if 1 or 2 tracking lasers
- Cone lasers can get very annoying for ships that do not have auto aiming weapons, or for waves that have upfield laser MIRV Bloomers.
- Always zip past Doomsday Lasers
 before you hear the Doomsday Lasers charging if you intend to dodge lasers , otherwise you will probably be too late. Don't hesitate. It's best to just zip past a Doomsday Laser if you are already approaching within 3 normal ship's width on left or right side of the Doomsday Laser .
 - Sound cues are very important for this mission. As you hear the lasers charging up, that is your cue to strafe. When you strafe, push up to either upper left or right corner of the field.
- If you do not have sound cues, unfortunately you need experience to know how to count down from 3s when laser lines appear, yet still strafe and destroy Invaders at the same time.
- If you do not have sound cues, unfortunately you need experience to know how to count down from 3s when laser
- (+) Getting Ogon Is Fine badges is high likely for such missions, except when you have more than 2 pellet spinners or 2 T4 pellet spinners (spiral).
- Eliminate all pellet spinners as quickly as possible. Especially the T3 and T4 pellet spinners (spiral).
- When pellet spinners are present, generally there will not be a lot of tracking lasers or cone lasers. Thus, it is possible to try turret riding, especially you have an offensive Aura . Otherwise, simply aim to eliminate these pellet spinners first.
- This is extremely difficult and only works properly if there are only 2 pellet spinners, and they are far apart. By far apart, I meant the spacing between the 2 outermost Vulture
 turrets. Or a similar distance between the middle turret of 2 Eagles
  .
. - Despite this, do eliminate the pellet spinner you are riding on so it is easier to move around after that to eliminate the rest of the Invaders.
- Don't try this on pellet spinners (spiral).
- However, Barrier Reflector and Phalanx Reflector apexes should stay downfield and use the chance to absorb all the lasers .
- This is extremely difficult and only works properly if there are only 2 pellet spinners, and they are far apart. By far apart, I meant the spacing between the 2 outermost Vulture
- Be careful not to randomly crash into pellets, especially when dodging tracking lasers .
Speedrunning
- Auras & Zens
- (+) Barrier Reflector apexes are king here. Properly sized and placed barriers can catch a huge amount of lasers coming from laser MIRVs , which is the biggest key. It is almost automatic that you will catch all of the tracking lasers and cone lasers (the latter being a little RNG based) if your barriers downfield spans the whole width of the field.
- Do not be afraid when dealing against Doomsday Lasers . Deploy barriers as per normal downfield but be prepared to dodge Doomsday Lasers if you cannot kill the Invader on time.
- Do not be afraid when dealing against Doomsday Lasers
- (+) Personal Shield is without a doubt, an offensive tool in this mission type. Having Super Reflect apexes are often not really necessary in higher ranks due to the sheer crazy amount of lasers that can be on field, other than when Rocs with not many laser MIRV Bloomers are present.
- Generally, Personal Shield should only be used in heavier waves in Act 3, or Act 4 and above since Invader lasers take 4s to fully fire. By then, most of, or all of the Invaders would be dead by your main weapon + any offensive Aura before you can reflect the lasers.
- Generally, Personal Shield
- (+) Mega Bomb is easily chargeable anywhere on field, so long you don't have too many speed lasers and you don't get rammed into by Invaders and die by turret collision.
- (=) Phalanx Reflector allows some speed but it only catches tracking lasers and cone lasers effectively. Difficult to catch lasers coming from laser MIRVs .
- (+) Barrier Reflector apexes are king here. Properly sized and placed barriers
- Without a doubt, reflecting as many lasers as possible is key to going fast.
- Traditional offensive Auras and Zens can still do very well here.
- When faced with less lasers or not many laser MIRVs , thus finding it difficult to find a good spot to reflect more than 4 lasers, a good technique is to trigger a laser MIRV, then go right on top of the center of the triggered laser MIRV and reflect all the lasers, which is at least 5 or 9 lasers (T1 and T2 laser MIRV respectively)
- No need to destroy any turrets other than speed lasers when they exist. Especially, laser MIRV Bloomers provide a lot of speed for reflecting lasers.
- If you are using a speedrunning ship that cannot deal against lasers , eliminate Ravens with cone lasers on one side of the field if necessary.
- Since laser MIRV Bloomers are your main source of laser reflecting, usually the best idea is to be in-between the laser MIRV Bloomers and around the middle of the field in order to pull off the most optimum Personal Shield laser reflects.
Fun
- Auras & Zens
- (+) Personal Shield for extremely satisfying laser reflects and vaporizing waves, especially those with a lot of laser MIRV Bloomers.
- (+) Top it up with Super Reflect for even more fun.
- (+) Barrier Reflector apexes are a huge ton of fun to use.
- (=) Phalanx Reflector apexes are a bit more difficult to use, and may not provide maximum fun value due to the need to keep replacing Phalanxes while lasers are firing. It is especially difficult to catch lasers coming out of laser MIRVs .
- (+) Personal Shield
- (+) Using auto aiming ships here can be a lot of fun as it is easy to avoid all the lasers by going in circles or hiding at the top corners of the field.
- (+) Activating a ton of laser MIRVs at the same time fills the field with a crazy amount of lasers . While slightly ironic to say, it is a beautiful mess.
- (+) You can play the cat-and-mouse chase with tracking lasers a LOT in this mission type. Just make sure you don't get diced by tracking lasers coming from left and right.